博客半年多没更新了. 正好最近时间比较多, 想着把博客更新下, 再把几篇平时总结的文章上传在Blog里面.
以前使用hexo搭的, 最近发现了好多人在用hugo, 自己使用hugo重新搭建了一下, 简单方便, 好感指数五颗星.
https://gohugo.io/getting-started/quick-start/
hugo 搭建
linux平台安装hugo #
- 源码安装
安装go:
https://golang.org/doc/install?download=go1.11.linux-amd64.tar.gz
$tar -C /usr/local -xzf go1.11.linux-amd64.tar.gz
$ vim /etc/profile
export PATH=$PATH:/usr/local/go/bin
下载源码安装hugo:
mkdir $HOME/src
cd $HOME/src
git clone https://github.com/gohugoio/hugo.git
cd hugo
go install
- apt安装
$sudo apt install hugo
使用 #
创建New site #
$hugo new site quickstart
创建md #
$hugo new posts/my-first-post.md
预览 #
$hugo server -D
Navigate to your new site at http://localhost:1313/.
个性化主题 #
网站配置 #
config.toml
baseURL = "https://example.org/"
languageCode = "en-us"
title = "My New Hugo Site"
theme = "ananke"
post到github pages上 #
- 升级git
Debian/Ubuntu
For the latest stable version for your release of Debian/Ubuntu

# apt-get install git
For Ubuntu, this PPA provides the latest stable upstream Git version
# add-apt-repository ppa:git-core/ppa # apt update; apt install git
- github上创建USER_NAME.github.io的repo.
- clone repo到public目录
git submodule add -b master git@github.com:<USERNAME>/<USERNAME>.github.io.git public
- push
depl4oy.sh如下
#!/bin/bash

echo -e "\033[0;32mDeploying updates to GitHub...\033[0m"

# Build the project.
hugo # if using a theme, replace with `hugo -t <YOURTHEME>`

# Go To Public folder
cd public
# Add changes to git.
git add .

# Commit changes.
msg="rebuilding site `date`"
if [ $# -eq 1 ]
  then msg="$1"
fi
git commit -m "$msg"

# Push source and build repos.
git push origin master

# Come Back up to the Project Root
cd ..
内容编写 #
文档模板 #
默认是archetypes /default.md. new 文档时, 根据这个文档创建.
我的default.md:
---
title: "{{ replace .TranslationBaseName "-" " " | title }}"
date: {{ .Date }}
lastmod: {{ .Date }}
draft: true
keywords: []
description: ""
tags: []
categories: []
author: ""

# You can also close(false) or open(true) something for this content.
# P.S. comment can only be closed
comment: false
toc: true
autoCollapseToc: false
# You can also define another contentCopyright. e.g. contentCopyright: "This is another copyright."
#contentCopyright: false
reward: false
mathjax: false
---

<!--more-->
插入图片 #
图片放在static目录下
例如
目录下的文件:
- static
   - deepin
      - desktop.png
      - splitScreen.png
      - vimMarkdownPreview.png
使用的时候:

文章摘要 #
<!--more-->前面的会成为文章的摘要, 在首页显示.
---
title : "hihi"
tags :  "blog"
---

<!--more-->

正文
显示toc #
toc : true
---
title: "Iqiyi开源hook框架XHook分析"
date: 2018-09-19T02:19:05+08:00
lastmod: 2018-09-19T02:19:05+08:00
draft: false
keywords: []
description: ""
tags: ["hook"]
categories: ["hook"]
author: ""

# You can also close(false) or open(true) something for this content.
# P.S. comment can only be closed
comment: false
toc: true
autoCollapseToc: false
# You can also define another contentCopyright. e.g. contentCopyright: "This is another copyright."
contentCopyright: false
reward: false
mathjax: false
---
语法高亮 #
Chroma #
hugo 使用chroma默认进行语法高亮, 垃圾, 不好用, 推荐highlight.js
pygmentsCodefences = true #高亮markdown的代码块
pygmentsCodefencesGuessSyntax = true #高亮markdown中没有标注语言的代码块
pygmentsStyle = 'manni' #高亮主题
有些主题的默认css设置了background. 会导致highlight时出现字体白色阴影. 此时我们需要将它的background-color删掉或者覆盖掉.
我使用的主题是jane, 默认css样式是/themes/jane/static/dist/jane.min.css:
#jane.min.css
 code{padding:0 7px;background:#f8f5ec;border-radius:4px;color:#c7254e}
把该块删掉.
这要就可以解决阴影的问题了.可能自己的主题版本太老了, 可以pull一下最新版本, 这个问题应该会被修复了 .
highlight.js #
添加主题css和highlight.pack.js.
customCSS = ['styles/dracula.css]
customJS = ['highlight.pack.js]
body中添加script:
<script>hljs.initHighlightingOnLoad();</script>
显示最后更新日期 #
enableGitInfo = true    # 开启gitinfo

[frontmatter]
date = ["date", "publishDate", "lastmod"]
lastmod = [":git", "lastmod", "date", "publishDate"]
publishDate = ["publishDate", "date"]
expiryDate = ["expiryDate"]
要实现该功能需要有commit记录 , 所以需要添加我们的.md到git版本控制工具 中. 请阅读下面的博客搭建心得.
数学公式 #
如何开启mathjax #
/layout/partical目录下创建mathjax_support.html, 写入:
<script type="text/javascript"
  src="https://cdnjs.cloudflare.com/ajax/libs/mathjax/2.7.1/MathJax.js?config=TeX-AMS-MML_HTMLorMML">
</script>
支持内联 #
/layouts/partials/custom_head.html
<script type="text/x-mathjax-config">
  MathJax.Hub.Config({tex2jax: {inlineMath: [['$','$'], ['\\(','\\)']]}});  // 内联公式
</script>
支持color #
/layouts/partials/custom_head.html
<script type="text/x-mathjax-config">
  MathJax.Hub.Config({                                                      // support color
  showProcessingMessages: false,
  jax: ["input/TeX", "output/HTML-CSS"],
  TeX: {
    TagSide: "left",
    Macros: {
      RR: '{\\bf R}',
      bold: ['{\\bf #1}',1]
    }
  }
});
</script>
mermaid #
mermaid支持画流程图, 甘特图等.
https://github.com/knsv/mermaid/releases
和使用highlight.js的方法类似:
添加mermaid.css 和 mermaid.min.js .
customCSS = ['styles/dracula.css', 'mermaid.css']            # if ['custom.css'], load '/static/css/custom.css' file
customJS = ['highlight.pack.js','mermaid.min.js']             # if ['custom.js'], load '/static/js/custom.js' file
script.html中添加
<script> mermaid.initialize({ startOnLoad: true });</script>
除此之外,还需要在主题的shortcodes目录下创建mermaid.html, 参考: mermaid笔记
<!--mermaid.html-->
<div class="mermaid" align="{{ if .Get "align" }}
                            {{ .Get "align" }}
                        {{ else }}
                            center
                        {{ end }}">
{{ safeHTML .Inner }}
</div>
使用 #
要被{{ xxx}}, {{ xxx }}, 括起来, xxx为<mermaid>和</mermaid>
graph TD
    Start --> Stop
生成:
graph TD Start --> Stop
博客搭建心得 #
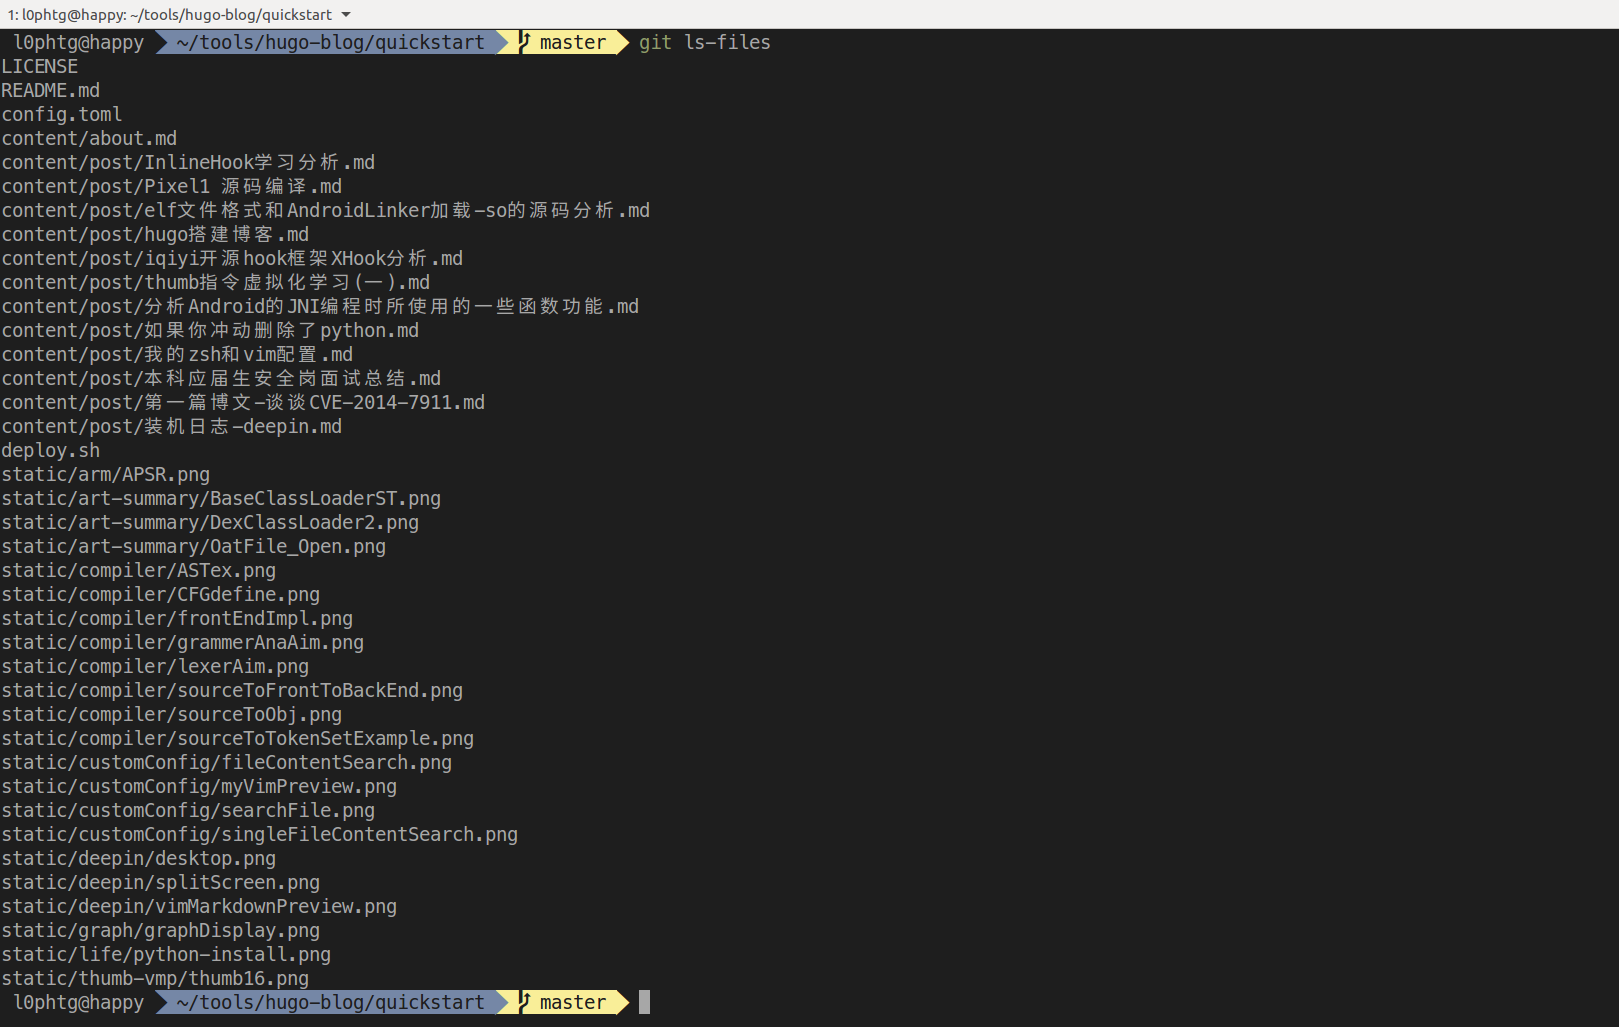
注意到, 在上文我们post网站到github pages 上时, 是将public目录作为submodule push的. (push 的就是public目录的内容 ).

我们可以将当前的hugo 目录, 按上图来说就是quickstart目录 作为我们的博客代码编写目录添加到quickstart的git版本控制中 .
我添加到git仓库中的文件有: config.toml, content/ , deploy.sh.
添加到版本控制的目的: 可以将它提交到我们的github或者 gitee上, 方便跨平台编辑, 也可以当作一个备份 .